Nagios is a powerful tool that allows you to monitor just about anything. It’s so easy to even take existing legacy system and adapt it to work with Nagios. When I came across kingkiwix and his blog here I wanted to repackage the content in a more user-friendly way for sharing. I wanted a solution that didn’t require me to pull in a bunch of development libraries and compilers. I also wanted a solution that I could re-use on other systems through a version controlled and packaged interface.
RPMs provide a version control and an automated set of scripts to configure the system how I want it. The beauty of them is that if you disagree with
something the tool you’re packaging does, you can feed RPMs patch files to accommodate it without obstructing the original authors intention.
Now I won’t lie and claim I wrote these SPEC files from scratch because I certainly didn’t. I took the stock ones that ship with both products (both Nagios and Nagios-Plugins) and modified them significantly to accommodate and satisfy my compulsive needs. 🙂
My needs required a bit more automation in the setup as well as including:
The use of nagiocmd user group.
A /etc/nagios/conf.d directory to behave similar to how Apache works. I want to be able to drop configuration files into here and just have it work without re-adjusting configuration files.
Alerting Apache on new updates/installs so just installing the package alone is all you need to do.
Nagios Plugins should work right away once they are installed.
Nagios Plugins and permissions should adapt to the new nagiocmd user and place in a common directory Nagios was already configured to look in.
Nagios Plugins has to many dependencies; I wanted to break this up into separate packages for those who needed them. For example, I don’t use MySQL at all; so why should I need the MySQL Libraries installed on my system just to use Nagios Plugins.
Nagios group permissions added to /etc/nagios directory for people using third party management applications. Just add any third party app to the Nagios group and they’ll be able to manage your configuration too:
# substitute <3rdpartyid> for the actual group/id belonging
# to the software in question.
usermod -a -G nagios <3rdpartyid>
The RPMs take care of just about everything for you, so there isn’t really much to do at this point.
Make sure Apache is running and if it isn’t start it:
# the following way is a harmless way of checking if Apache is
# running and starting it if it wasn't (requires root)
service httpd status || service httpd start

# If it wasn't started in the above command, you may want to
# consider having it start up each time you reboot your machine
# through the following command:
chkconfig httpd --levels 345 on
Start Nagios
# Startup Nagios (requires root)
service nagios start

# Consider having Nagios (Backend) start up each time you reboot
# your machine through the following command:
chkconfig nagios --levels 345 on

# You'll also want to set up a nagiosadmin password
# The below will set you up with one using the pass of 'password'
sudo htpasswd -cb /etc/nagios/htpasswd.users nagiosadmin password
Visiting http://localhost/nagios/ should look similar to this if you followed the steps correctlyYes, that’s right… you’re done! You can access your Nagios Web Interface by visiting http://localhost/nagios. How you configure your system further is beyond the scope of this tutorial/blog. My goal was just to get you started with an out of the box working Nagios solution :).
If your not already familiar with Nagios, you may want to read the documentation so you can monitor more then just the 8 example checks it sets up for you out of the box. There are also some great web configuration tools you can check out as well here.
Package Information
Software installs to: /usr/share/nagios
Plugins install to: /usr/lib64/nagios/plugins. Keep in mind I packaged everything in such a way that compiling it for 32-bit will work fine. In which case you’ll find plugins installed to: /usr/lib/nagios/plugins
Website is accessible at: http://localhost/nagios/ out of the box, but you can adjust it’s web configuration by adjusting /etc/httpd/conf.d/nagios.conf to your likings.
Nagios Core 4 configuration file can be found at: /etc/nagios/nagios.cfg and a newly added /etc/nagios/conf.d/ directory has been added to make some things easier to add/remove later.
# SELinux Users may wish to turn this flag on if they intend to allow it
# to call content as root (using sudo) which it must do for some status checks.
setsebool -P nagios_run_sudo on
I want to repackage this myself
All of my blogs provide a way to build everything from scratch yourself for those who don’t want to just download the binary packages and roll with them. I use mock for everything I build so I don’t need to haul in development packages into my native environment. You’ll need to make sure mock is setup and configured properly first for yourself:
# Install 'mock' into your environment if you don't have it already.
# This step will require you to be the superuser (root) in your native
# environment.
yum install -y mock

# Grant your normal every day user account access to the mock group
# This step will also require you to be the root user.
usermod -a -G mock YourNonRootUsername
At this point it’s safe to change from the ‘root‘ user back to the user account you granted the mock group privileges to in the step above. We won’t need the root user again until the end of this tutorial when we install our built RPM.
# Perhaps make a directory and work within it so it's easy to find
# everything later
mkdir nagiosbuild
cd nagiosbuild
###
# Now we want to download all the requirements we need to build
###
# Nagios Core 4
wget http://prdownloads.sourceforge.net/sourceforge/nagios/nagios-4.2.0.tar.gz
# Nagios Plugins v1.5
wget https://www.nagios-plugins.org/download/nagios-plugins-1.5.tar.gz
# Customize Nagios Spec Files
wget http://repo.nuxref.com/pub/nuxref/nagios/nagios.spec
# Customize Nagios Plugin Spec Files
wget http://repo.nuxref.com/pub/nuxref/nagios/nagios-plugins.spec
# Nagios Patch to enable a conf.d directory
wget http://repo.nuxref.com/pub/nuxref/nagios/nagios.conf.d.patch
# Nagios Patch to fix accumulating files in /tmp/*
wget http://repo.nuxref.com/pub/nuxref/nagios/configtest.tmp.patch
# Nagios Plugin Patch to include some sample configurations and
# setup Nagios to work out of the box
wget http://repo.nuxref.com/pub/nuxref/nagios/add.sample.command.cfg.patch

###
# Prepare our mock environment
###
# Initialize Mock Environment
mock -v -r epel-6-x86_64 --init

# Copy in our downloaded content:
mock -v -r epel-6-x86_64 --copyin nagios-4.2.0.tar.gz
   nagios-plugins-1.5.tar.gz
   nagios.conf.d.patch
   add.sample.command.cfg.patch
   onfigtest.tmp.patch
   /builddir/build/SOURCES

mock -v -r epel-6-x86_64 --copyin nagios.spec nagios-plugins.spec
   /builddir/build/SPECS

# Install Dependencies
mock -v -r epel-6-x86_64 install gd-devel zlib-devel
   libpng-devel libjpeg-devel doxygen gperf perl-devel net-snmp-devel

# Install Plugin Dependencies
mock -v -r epel-6-x86_64 install bind-utils mysql-devel net-snmp-utils
               postgresql-devel ntp openldap-devel openssh-clients
               samba-client /usr/bin/mailq

###
# Build Stage
###
# Shell into our enviroment
mock -v -r epel-6-x86_64 --shell

# Change to our build directory
cd builddir/build

# Build our RPMS
rpmbuild -ba SPECS/nagios.spec
rpmbuild -ba SPECS/nagios-plugins.spec

# we're now done with our mock environment for now; Press Ctrl-D to
# exit or simply type exit on the command line of our virtual
# environment
exit

###
# Save our content that we built in the mock environment
###
mock -v -r epel-6-x86_64 --copyout \
   /builddir/build/SRPMS/nagios-4.2.0-2.el6.src.rpm .
mock -v -r epel-6-x86_64 --copyout \
   /builddir/build/SRPMS/nagios-plugins-1.5-5.el6.src.rpm .
mock -v -r epel-6-x86_64 --copyout \
   /builddir/build/RPMS/nagios-plugins-1.5-5.el6.x86_64.rpm .
mock -v -r epel-6-x86_64 --copyout \
   /builddir/build/RPMS/nagios-plugins-mysql-1.5-5.el6.x86_64.rpm .
mock -v -r epel-6-x86_64 --copyout \
   /builddir/build/RPMS/nagios-plugins-pgsql-1.5-5.el6.x86_64.rpm .
mock -v -r epel-6-x86_64 --copyout \
   /builddir/build/RPMS/nagios-plugins-ldap-1.5-5.el6.x86_64.rpm .
mock -v -r epel-6-x86_64 --copyout \
   /builddir/build/RPMS/nagios-ntp-1.5-5.el6.x86_64.rpm .
mock -v -r epel-6-x86_64 --copyout \
   /builddir/build/RPMS/nagios-snmp-1.5-5.el6.x86_64.rpm .
mock -v -r epel-6-x86_64 --copyout \
   /builddir/build/RPMS/nagios-samba-1.5-5.el6.x86_64.rpm .
mock -v -r epel-6-x86_64 --copyout \
   /builddir/build/RPMS/nagios-plugins-debuginfo-1.5-5.el6.x86_64.rpm .
mock -v -r epel-6-x86_64 --copyout \
   /builddir/build/RPMS/nagios-4.2.0-2.el6.x86_64.rpm .
mock -v -r epel-6-x86_64 --copyout \
   /builddir/build/RPMS/nagios-contrib-4.2.0-2.el6.x86_64.rpm .
mock -v -r epel-6-x86_64 --copyout \
   /builddir/build/RPMS/nagios-devel-4.2.0-2.el6.x86_64.rpm .
mock -v -r epel-6-x86_64 --copyout \
   /builddir/build/RPMS/nagios-selinux-4.2.0-2.el6.x86_64.rpm .
mock -v -r epel-6-x86_64 --copyout \
   /builddir/build/RPMS/nagios-debuginfo-4.2.0-2.el6.x86_64.rpm .

# *Note that all the commands that interact with mock I pass in
# the -v which outputs a lot of verbose information. You don't
# have to supply it; but I like to see what is going on at times.

# **Note: You may receive this warning when calling the '--copyout'
# above:
# WARNING: unable to delete selinux filesystems
#    (/tmp/mock-selinux-plugin.??????): #
#    [Errno 1] Operation not permitted: '/tmp/mock-selinux-plugin.??????'
#
# This is totally okay; and is safe to ignore, the action you called
# still worked perfectly; so don't panic :)
Considerations
If you take Nagios seriously, you will really want to consider expanding it to support one (or all) of the following addons:
NRPE – Nagios Remote Plugin ExecutorNRPE – Nagios Remote Plugin Executor
NRPE is an addon that allows you to execute plugins on remote Linux/Unix hosts. This is useful if you need to monitor local resources/attributes like disk usage, CPU load, memory usage, etc. on a remote host. Similar functionality can be accomplished by using the check_by_ssh plugin, although it can impose a higher CPU load on the monitoring machine – especially if you are monitoring hundreds or thousands of hosts.
NSCA – Nagios Service Check AcceptorNSCA – Nagios Service Check Acceptor
NSCA is an addon that allows you to send passive check results from remote Linux/Unix hosts to the Nagios daemon running on the monitoring server. This is very useful in distributed and redundant/failover monitoring setups.
I’m considering packaging these as well to conform with the packages I’ve already provided here, but I’ll do that in another blog some other time if there ends up being a demand for it 🙂.
Wiki’s have got to be the easiest and fastest way to collaborate documents, thoughts, ideas, howto’s etc. In fact, everything I’ve blogged about is mostly cut and copied from my own personal Wiki I maintain on my private network to help me keep track of things.
There are lots of wiki solutions, but I personally like MediaWiki which uses a relational database on it’s back end. It’s also has a strong background as it’s widely used by the most popular wiki’s being hosted today. Here is how MediaWiki defines itself official (quoted directly from their website):
MediaWiki is a free software open source wiki package written in PHP, originally for use on Wikipedia. It is now also used by several other projects of the non-profit Wikimedia Foundation and by many other wikis..
There are tutorials everywhere for this; why make another?
As an administrator/developer myself, I like to eliminate as many steps as I can and make things as easy as possible. I also like to let the operating systems chosen package management software do most (if not all) of the work if possible. So unlike other tutorials; this solution will do most of the work for you out of the box. I have packaged a self installing RPM that prepares MediaWiki along with some useful extensions. Package management and version control is the real seller I think.
Whatever, just give me all of your software
This is what my blogs usually boil down to… so here is the data:
For those who want to rebuild from source and do not trust my rpm will need to perform the following:
# If you haven't got mock configured and installed by this point,
# it's probably better if you read one of the previous blogs I've
# posted where I show how to set it up.  To keep this blog shorter
# i'm going to refrain from explaining this step.
# Since this tutorial supports both CentOS/EPEL 5 and 6 set the
# version we're interested in:
VER=6

# Download the packages we need to make this happen:
# 1. MediaWiki itself
wget http://download.wikimedia.org/mediawiki/1.21/mediawiki-1.21.2.tar.gz
# 2. WYSIWYG, manually get it here:
# https://docs.google.com/file/d/0B-aiZzKTmWI2bG8yVzBCOWNLamM/view?pli=1
# or keep using wget for speed (I copied it since I couldn't find a way
# to direct link to a google drive location).
wget --output-document=WYSIWYG_MW_v1.20.2.zip https://www.dropbox.com/sh/9dt7klam6ex1kpp/f79PvTQ_g7/20131105/mediawiki/WYSIWYG_MW_v1.20.2.zip?dl=1
# 3. WYSIWYG patch #1
wget --output-document=wysiwyg.cancel.fix.patch https://www.dropbox.com/sh/9dt7klam6ex1kpp/qxTV7Duu8G/20131105/mediawiki/wysiwyg.cancel.fix.patch?dl=1
# 4. WYSIWYG patch #2
wget --output-document=mw-1.21.compatible.patch https://www.dropbox.com/sh/9dt7klam6ex1kpp/qoOCF2P16A/20131105/mediawiki/mw-1.21.compatible.patch?dl=1
# 5. The RPM SPEC file
wget --output-document=mediawiki.spec https://www.dropbox.com/sh/9dt7klam6ex1kpp/Cv9_1FynJ-/20131105/mediawiki/mediawiki.spec?dl=1
# 6. A seperate package labeled as extras (which right now
#    just contains a working Secure Apache configuration file)
#    but could be subject to change later such as supporting
#    Lighthttpd and NginX.
wget --output-document=extras.tar.gz https://www.dropbox.com/sh/9dt7klam6ex1kpp/2R7BZSuXYW/20131105/mediawiki/extras.tar.gz
# Initialize our Environment (I hope your set the $VER
# variable above)
mock -v -r epel-$VER-x86_64 --init

# Copy in our downloaded content:
mock -v -r epel-$VER-x86_64 --copyin mediawiki.spec
   /builddir/build/SPECS
mock -v -r epel-$VER-x86_64 --copyin
   mediawiki-1.21.2.tar.gz
   WYSIWYG_MW_v1.20.2.zip
   extras.tar.gz
   mw-1.21.compatible.patch
   wysiwyg.cancel.fix.patch
   /builddir/build/SOURCES

# Shell into our enviroment
mock -v -r epel-$VER-x86_64 --shell

# Change to our build directory
cd builddir/build

# Build our RPMS
rpmbuild -ba SPECS/mediawiki.spec

# we're now done with our mock environment for now;
# Press Ctrl-D to exit or simply type exit on the
# command line of our virtual environment
exit

# Grab our packages (v6):
[ "$VER" == "6" ] &&
  mock -v -r epel-6-x86_64 --copyout
     /builddir/build/SRPMS/mediawiki-1.21.2-1.el6.src.rpm .
[ "$VER" == "6" ] &&
  mock -v -r epel-6-x86_64 --copyout
   /builddir/build/RPMS/mediawiki-1.21.2-1.el6.noarch.rpm .

# -or- Grab our packages (v5):
[ "$VER" == "5" ] &&
  mock -v -r epel-5-x86_64 --copyout
   /builddir/build/SRPMS/mediawiki-1.21.2-1.el5.centos.src.rpm .
[ "$VER" == "5" ] &&
  mock -v -r epel-5-x86_64 --copyout
   /builddir/build/RPMS/mediawiki-1.21.2-1.el5.centos.noarch.rpm .
Package Information
Software installs to: /usr/share/mediawiki
Apache configuration placed in: /etc/httpd/conf.d/mediawiki.conf and can be previewed here.
WYSIWYG Extension is additionally packaged as an extra for those who wish to use it. The installer will give you the option of adding this. I’ve already applied all of the necessary patches they’ve listed on their website to make it work correctly with MediaWiki v1.21.2. You can view the patch files I created here and here.
Keep in mind that MediaWiki requires a bare minimum of PHP v5.3 (and a minimum PostgreSQL v8.4 for those database fans like me). These packages are all available to CentOS 5 users right out of the box and Red Hat 5 users through the EPEL packages.
Installation Information
Identified below outline the 3 steps necessary to get up and going.
Installation Step 1 of 3: Choose Your Database Backend:
First thing is first, you need to choose a database back end. This tutorial will use PostgreSQL because to me, that is the best and most underrated open source database available today. That said, I’ve identified how to install the other open source choices below. You’ll need to have satisfied at least one of the below options before you can proceed.
1. MySQL:
# Install Dependencies (if they're not already)
yum install mysql-server mysql php-mysql
# Enable Server (if it's not already)
# Set MySQL to restart at system startup
chkconfig --level 345 mysqld on
# Start MySQL (if it's not already)
service mysqld start
# Reload Apache (needed if php-mysql was added above)
service httpd reload
2. SqlLite:
# Install Dependencies (if they're not already)
yum  install sqlite php-sqlite
# Reload Apache (needed if php-sqlite was added above)
service httpd reload
3. PostgreSQL:
# Install Dependencies (if they're not already)
yum install postgresql postgresql-server php-pgsql
# Enable Server (if it's not already)
# Set MySQL to restart at system startup
chkconfig --level 345 postgresql on
# Start PostgreSQL (if it's not already)
# If this is your first time starting it; it may require you to run
# the following: service postgresql initdb
# Note: Do not run 'initdb' if your database is already configured
#       or you will reset it and lose it's contents.  But you are
#       required the call it the first time.
service postgresql start
# Reload Apache (needed if php-pgsql was added above)
service httpd reload
# You may need to additional set up some security to allow Apache
# access to your database.  Depending on your knowledge, the
# below command may or may not satisfy your needs. But as a quick
# and dirty solution to gain immediate access to the database
# (and greatly simplifies this tutorial), I'd advise people to
# run the following:
sed -i -e 's/^[ t]*(local|host)([ t]+.*)/#12/g'
    /var/lib/pgsql/data/pg_hba.conf
cat << _EOF >> /var/lib/pgsql/data/pg_hba.conf
# Configure all local database access with trust permissions
local   all         all                               trust
host    all         all         127.0.0.1/32          trust
host    all         all         ::1/128               trust
_EOF
# Restart the Database so it takes on the new Client
# Authentication identified above
service postgresql restart
Your installation will not change that significantly if you did not pick PostgreSQL as your chosen backend identified above. In fact, it may even be easier to install since other databases have fewer security restrictions. You can still follow through with the actions explained below.
Installation Step 2 of 3: Install The MediaWiki Package:
# Install Dependencies (if they're not already)
# At the present time I do not generate a GPG signature, so without
# the --nogpg check yum will tell you it can't install the package.
yum localinstall mediawiki-1.21.2-1.el6.noarch.rpm --nogpg

# Of if using CentOS/RHEL 5 you can type the following:
# yum localinstall mediawiki-1.21.2-1.el5.centos.noarch.rpm --nogpg

# Reload Apache (needed if php-sqlite was added above)
service httpd reload

# If you're using SELinux, then you will have to enable access
# to your database from Apache (if you haven't already). Otherwise
# you will receive errors about not being able to connect to
# your database during the setup stage.
semanage boolean -m --on httpd_can_network_connect_db
# for uploading (specifically to images/), this works best:
semanage fcontext -a -t httpd_sys_content_t '/usr/share/mediawiki(/.*)?'
restorecon -R /usr/share/mediawiki
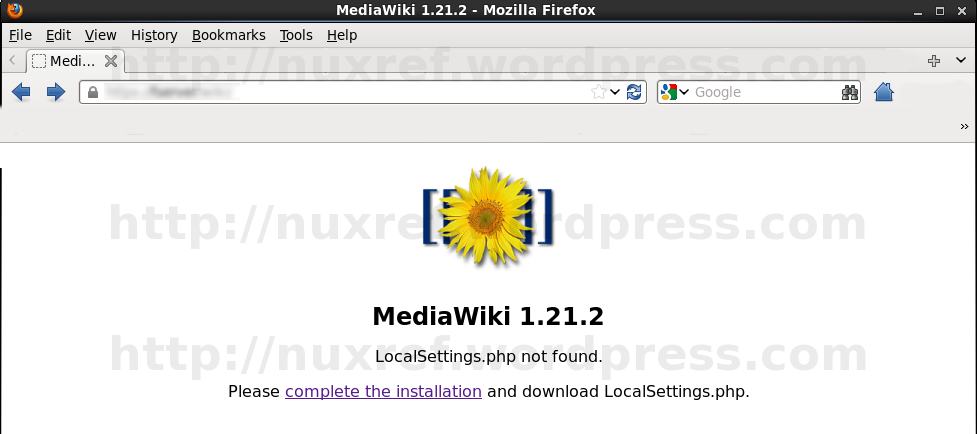
Here is what should be displayed if you installed the mediawiki RPM and visit http://localhost/wiki
Configure MediaWiki
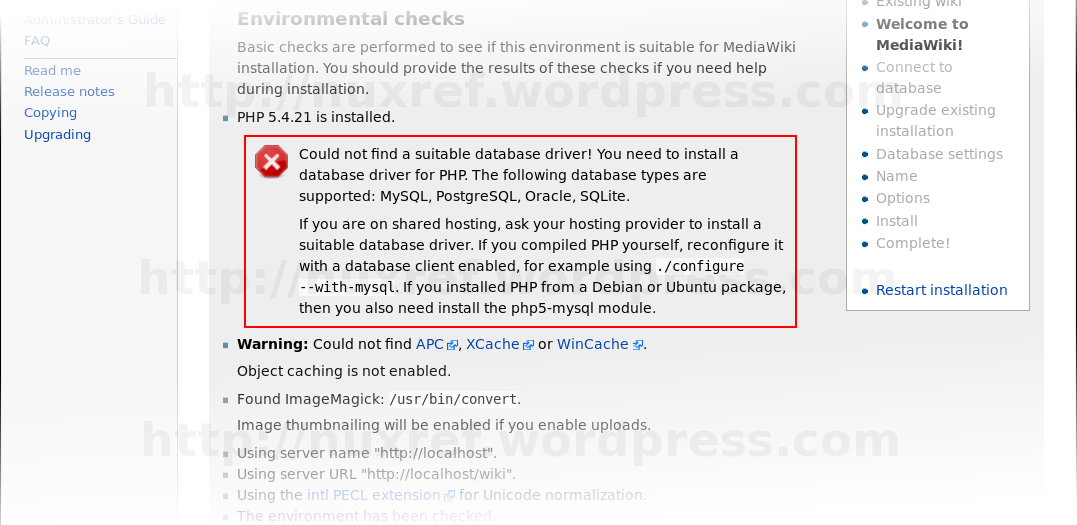
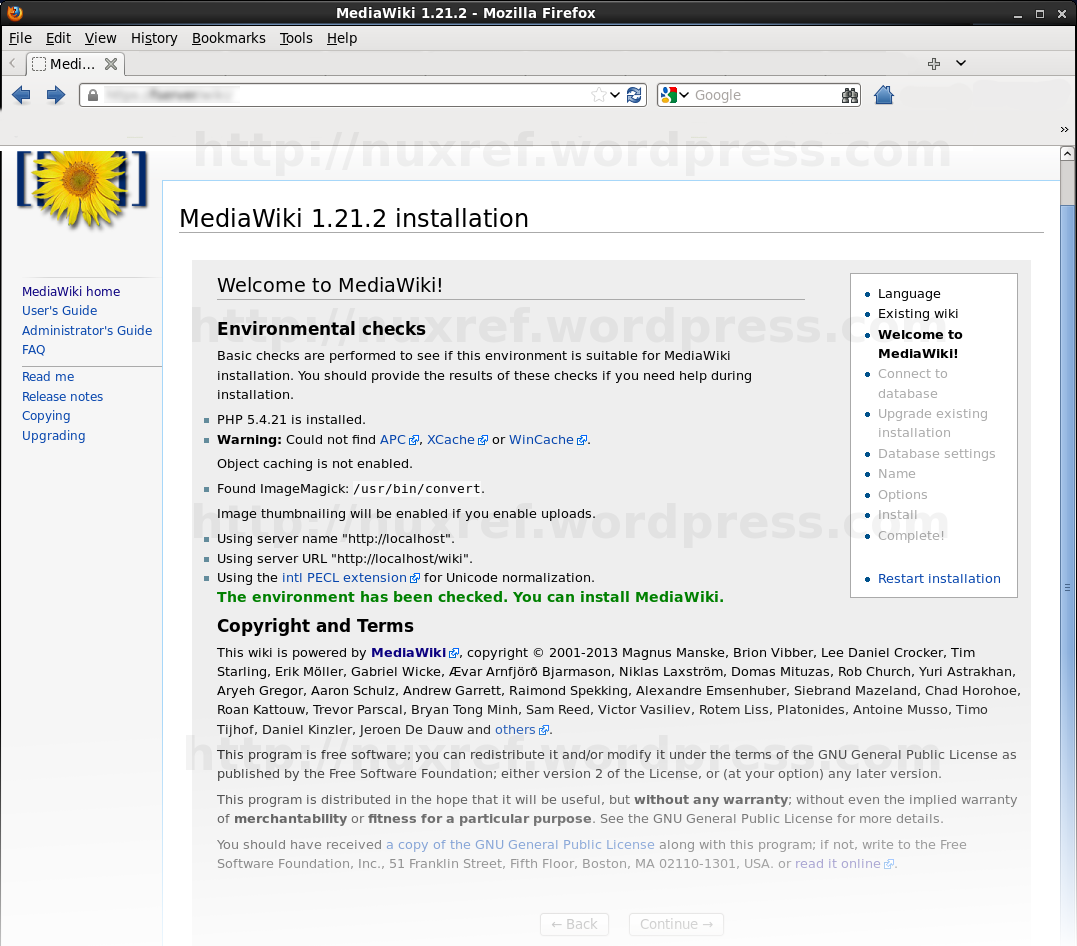
You MUST complete ‘Installation Step 2 of 3’ defined above or you’ll receive this error message!Your screen does not have to look exactly like this; but the most important part is where it tells you that “The environment has been checked. You can install MediaWiki”.
If you’re reading this far, then you’ve completed both of the installation steps above. Now we want to configure MediaWiki which is now already available to you. You can access it by opening a browser and visiting: http://localhost/wiki. Alternatively, if your doing this remotely, substitute localhost for your sites hostname or IP address. You should be presented with a webpage that looks similar to the screenshot presented here. You’ll want to click on the link that says complete the installation to set the Wiki up for your environment style.
Follow through the wizard answering all the questions asked of you. If you’re unsure of any answers to the questions being asked, usually the default answers are satisfactory enough.
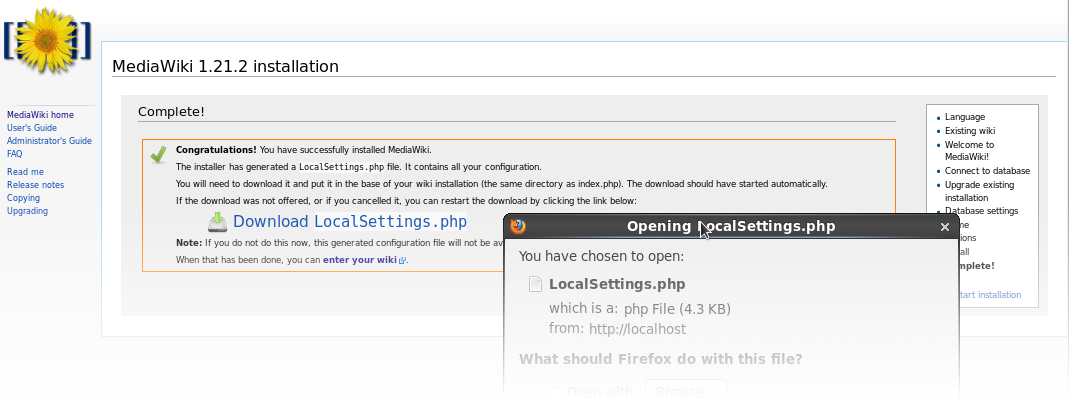
Installation Step 3 of 3: The LocalSettings.php
When you’ve successfully completed the configuration you will be asked to download LocalSettings.phpWhen you’ve completed the wiki’s installation wizard, it will ask you to save/download a file entitled LocalSettings.php. This file contains all the information the wiki needs to work with. You MUST download this file and copy it to /usr/share/mediawiki.
# Copy LocalSettings.php into the mediawiki's installation
# directory; This step is crucial!
cp LocalSettings.php /usr/share/mediawiki

# Update it's permissions for security sake!
chown root.apache /usr/share/mediawiki/LocalSettings.php
chmod 640 /usr/share/mediawiki/LocalSettings.php
LocalSettings.php becomes the final piece of the puzzle; it contains all of the options you choose and will instruct your wiki how to behave. Once this file is in place, you’re finished with the setup! 🙂
You can access your wiki and record and collaborate information to your hearts content!
The Apache configuration file that is included with this bundle is smart enough to detect the LocalSettings.php file and switch to it’s full out Wiki mode. Now when you visit your website (http://localhost/wiki) you can begin molding it to your liking. Note that the Apache configuration file included additionally adds support for colons (:) in your wiki paths. This allows you to create wiki’s such as: http://localhost/wiki/MySpecialWikiPage:That:Uses:Colons. Colon’s really make it so your wiki can mold and organize itself like the most popular wiki (Wikipedia.org) website used today.
Backups
Always consider that the worst can happen, you should:
Take regular backups of your database
Make backups of the /usr/share/mediawiki/images directory at the same time as your database backups since this is where other media content can get uploaded to
Store your LocalSettings.php you recently downloaded along with the mediawiki rpm package somewhere safe so you can always easily recover.
July 17th, 2014 Update
Since this blog was written newer versions of MediaWiki came out along with my repository I host. For those who want to update to the newer version (or just starting out and want to fetch the latest version) you can get it there.
You can also just download it directly here:
Just note that I scrapped the WYSIWYG plugin and all the patches I made for it in this release. I did this simply because it’s just getting too dated and no one is updating it anymore. If it’s the first time reading this blog or you’re retrieving MediaWiki for the first time, then this blog and it’s content still applicable (except WYSIWYG references) to the newer version.
For those of you who already are running a version of MediaWiki and want to upgrade. Upgrade instructions can be found here. Alternatively, if you’re simply upgrading from the version identified in this blog (v1.21), just run the following after you install the new rpm (and then you’re good to go!):
# Consider making a database backup snapshot of your wiki 'just in case'
# I didn't have any problems at all, but it doesn't mean you won't.
# Better safe then sorry... right?

# As root, upgrade your mediawiki package
yum upgrade -y mediawiki --disablerepo=*
   --enablerepo=nuxref
   --enablerepo=nuxref-shared

# Eliminate any reference to WYSIWYG since it will be gone now
sed -i -e 's|^([^#]+extensions/WYSIWYG/WYSIWYG.php.*)$|#1|g'
    /usr/share/mediawiki/LocalSettings.php

# Run Upgrade Script
php /usr/share/mediawiki/maintenance/update.php

# Protect /usr/share/mediawiki/mw-config/ from access
chown root.apache /usr/share/mediawiki/mw-config/
chmod 700 /usr/share/mediawiki/mw-config
Another thing you might want to do is bump the file sizes you intend to upload (especially if you’re going to allow .zip, .rar. etc extensions onto your wiki):
# optionally support extra file extensions that can be uploaded:
cat << _EOF >> /usr/share/mediawiki/LocalSettings.php
$wgFileExtensions = array_merge(
    $wgFileExtensions, array(
        'pdf', 'doc', 'docx', 'xls', 'xlsx',
        'rpm', 'tar', 'zip', 'tgz', 'gz',
        )
    );
_EOF

sed -i -e 's/^(upload_max_filesize *=).*/1 100M/g' /etc/php.ini
sed -i -e 's/^(post_max_size *=).*/1 100M/g' /etc/php.ini

# Reload service
service httpd reload
Credit
Please note that this information took me several days to put together and test thoroughly. I may not blog often; but I want to re-assure the stability and testing I put into everything I intend share.
If you like what you see and wish to copy and paste this HOWTO, please reference back to this blog post at the very least. It’s really all I ask.
Sources
I used mediawiki.org and view the ideal setup configurations as well as read through peoples notes and work arounds. Note: At the time this blog was created v1.21.2 was the current stable version, so that is what was packaged.
WYSIWYG Extension is also packaged in the RPM I provided. I created 2 small patches using the comments here and here.
The Media Transfer Protocol (MTP) provides us direct file access to devices such as our smart phones and other devices that choose to use the protocol. In my case, my Nexus 4 couldn’t correctly attach itself to my system. From my Google results; it seemed to be due to the version of libmtp I was running. You see, CentOS/RHEL ships with libmtp v1.0 and most of the support for cell phones that came out within the last 2 years isn’t available until v1.1. libmtp v1.1 additionally builds against most peoples FUSE implementations such as MTPfs, jmtpfs and simple-mtpfs. It’s through these FUSE/MTP implementations that we can easily mount and directly access the content on our smart phones and tablets that use the MTP protocol.
So upgrade libmtp already; why are you blogging about it?
Oh boy… well here are all the problems I faced:
VLC Media Player is built against this same library. Upgrading it means looking after this dependency too; or go without it (no, not going to happen).
Rhythmbox is also built against this same library (libmtp). Upgrading it means looking after this dependency too; or go without it (again… not going to happen).
Then the second problem… we’ve only tackled the upgrade of libmtp above if we go through with this… we still haven’t even tackled the FUSE implementation. Here are the results I had testing some of them:
MTPfs: At the time of this blog, the last update for this software was on February 4th, 2010. I got the software to compile by simply using the version that ships with Fedora 18 (1.1-0.3.svn20120510) but when I tried to use it, it just hung as a normal user. If I tried mounting the device as root it would fail (see below):
$ mkdir media
$ # As myself (non-root)
$ mtpfs media/
Listing raw device(s)
Device 0 (VID=18d1 and PID=4ee1) is a Google Inc (for LG Electronics/Samsung) Nexus 4/10 (MTP).
   Found 1 device(s):
   Google Inc (for LG Electronics/Samsung): Nexus 4/10 (MTP) (18d1:4ee1) @ bus 2, dev 89
Attempting to connect device
libusb_open() failed!: Permission denied
LIBMTP PANIC: Unable to initialize device
Unable to open raw device 0

$ # As root (superuser)
$ sudo mtpfs media
Listing raw device(s)
Device 0 (VID=18d1 and PID=4ee2) is a Google Inc (for LG Electronics/Samsung) Nexus 4/10 (MTP+ADB).
   Found 1 device(s):
   Google Inc (for LG Electronics/Samsung): Nexus 4/10 (MTP+ADB) (18d1:4ee2) @ bus 2, dev 73
Attempting to connect device
Android device detected, assigning default bug flags
Error 1: Get Storage information failed.
Error 2: PTP Layer error 02fe: get_handles_recursively(): could not get object handles.
Error 2: Error 02fe: PTP: Protocol error, data expected
Listing File Information on Device with name: (NULL)
LIBMTP_Get_Storage() failed:-1
Now I don’t want to give MTPfs a bad name. It’s quite possible that it works really well but just not for my personal purposes. In fact it compiles perfectly in CentOS/RHEL 6 right out of the box without any modifications. Therefore just because it didn’t work for me doesn’t mean it won’t necessarily work for you. For this reason and the fact it was once maintained (up to Fedora 18) I’ll include my results with it here too.
jmtpfs worked the best for me. The only problems I ran into with this software was that it wasn’t already packaged for CentOS/RHEL. The only thing I had to work with for packaging it myself was a very long set of comments (see the link back to it’s official site to see what I’m talking about). That all said; the software works fantastic right out of the box. Kudos to the great work of the developer and his online support.
simple-mtpfs works well too but required some tweaking to make it possible. You see, simple-mtpfs relies on the new C++11 compiling features and standards (which truly are amazing BTW) but weren’t available during the release of CentOS/RHEL 6. Making these standards available by upgrading the glib core library to a newer version would be just crazy. In fact, you could seriously risk jeopardizing the stability of the OS itself since everything else would have been compiled against the old version. So, to work around this, I wrote a small patch file for portions of the simple-mtpfs code mimicking the old behavior prior to the C++11 standards.
Just hand over everything
Of course… and as always; I planned on it. Hopefully you’ll find the packages useful! Like my other blogs, the installation instructions will be near the bottom of this blog, along with the ‘do it yourself’ for those who don’t trust the sources.
First thing is first; this is what makes everything else tick:
Here are the dependencies you may or may not need to get out of the way. Note that I just went ahead and upgraded VLC to 2.0.6 (from the stock version 1.1). There may be other dependencies of libmtp you find that I didn’t simply because I didn’t use those packages. You can just assume that all of the binary packages listed below have been compiled against libmtp v1.1 (shared above).
After you’ve got libmtp correctly installed and your system appears to be right back in the state it was previously, we can now move on to adding one of the excellent FUSE/MTP packages some incredible developers have put together for us.
jmtpfs-0.4-1.el6.x86_64.rpm
Author: Jason Ferrara (Website)
Source: jmtpfs-0.4-1.el6.src.rpm
Compilation Details: I made 1 small patch file (see here) introducing some of the nice idea’s his followers of his blog suggested for auto-mounting. I additionally had to make one small change so that his code could compile against the version of FUSE currently shipped with CentOS/RHEL 6. The only other thing I can take credit for is the rpm packaging itself; the rest of the work was that of the hard working developer who made this application possible. The spec file I wrote can be seen here.
simple-mtpfs-0.1-8.el6.x86_64.rpm
Author: Peter Hatina (Website)
Source: simple-mtpfs-0.1-8.el6.src.rpm
Compilation Details: I created 2 separate patch files for this to properly compile in CentOS/RHEL. The first patch rolls back the C++11 coding styles to the older way of doing it (so it can compile against our existing libraries). The second patch introduces the auto-mounting for our environment (exactly how It was done in my patch for jmtpfs). To accommodate these patch files I needed to additionally update the spec file which you can view here.
mtpfs-1.1-0.3.svn20120510.el6.x86_64.rpm
Author: Chris Debenham (Website)
Source: mtpfs-1.1-0.3.svn20120510.el6.src.rpm
Compilation Details: No magic went on here; I just grabbed the packaged code from a Fedora 18 release on pkgs.org and it compiled without any problems. Note: It appears the support for this package was dropped after Fedora 18 since it isn’t available for either Fedora 19 or 20.
Here are the source packages for those who are interested:
In some cases you’ll need to use what I’ve done (patch wise); but to be as transparent as possible, I’ll show you how you can easily build everything and review all of what is going on before committing to using it. Now keep in mind also; there is A LOT of stuff covered here. There is libmtp itself, the dependencies issues and then finally the choice of FUSE/MTP implementation. I’ll cover the dependencies last since not everyone will have this issue.
First I set up a mock environment to work in; this allows us to do compiling outside of our native environment and means we don’t need to ever install any development libraries.
First prepare our development environment with mock if you haven’t already:
# Install 'mock' into your environment if you don't have it already
# This step will require you to be the superuser (root) in your native
# environment.
yum install -y mock

# Grant your normal every day user account access to the mock group
# This step will also require you to be the root user.
usermod -a -G mock YourNonRootUsername
At this point we can get away from the root user and build using our own user we created for our system.
Now we’ll cover libmtp v1.1 as everything revolves around this library.
# Fetch the latest copy (already packaged) of libmtp
wget http://dl.fedoraproject.org/pub/fedora/linux/development/20/source/SRPMS/l/libmtp-1.1.6-2.fc20.src.rpm
# As time goes on, this rpm may not be available, but
# you should be able to just get away with grabbing the latest
# copy of libmtp from http://pkgs.org

# Now we just rebuild it against our own environment
mock -v -r epel-6-x86_64 --resultdir=$(pwd)/results
       --rebuild libmtp-1.1.6-2.fc20.src.rpm

# Now all our built RPMs will be in a directory
# entitled 'results' to make things easier, we'll just
# move it all into the directory we're working in now
find results -name '*.rpm' -exec mv {} . ;

# We can eliminate the results directory now
rm -rf results
Everything from this point forward assumes we have a built copy of libmtp to work with. Now we’ll focus on the FUSE/MTP options.
Option 1: simple-mtpfs
# Fetch our source
wget --output-document=simple-mtpfs-0.1-8.el6.src.rpm https://www.dropbox.com/sh/9dt7klam6ex1kpp/KEU68ZzLIv/20131015/mtp/simple-mtpfs-0.1-8.el6.src.rpm?dl=1

# Initialize our Environment
mock -v -r epel-6-x86_64 --init

# Now install the nessisary dependencies for simple-mtpfs
# which we must additionally include the libmtp package we
# just built
mock -v -r epel-6-x86_64 --install libmtp-1.1.6-2.el6.x86_64.rpm
                                   libmtp-devel-1.1.6-2.el6.x86_64.rpm
                                   fuse-devel

# Now if you don't have any insecurities with source rpms you
# can finish with the next command... or you can skip it and
# extract all of it's content for inspection before building.
# all of the results will appear in the 'results' directory.
# Note: You'll want to skip this step and move to the next if
# you have any insecurities at all.
mock -v -r epel-6-x86_64 --no-clean
                         --resultdir=$(pwd)/results
                         --rebuild simple-mtpfs-0.1-8.el6.src.rpm

# For those really insecure can keep reading and perform
# the following steps instead of the single command above
# Copy our source into the mock building environment
mock -v -r epel-6-x86_64 --copyin simple-mtpfs-0.1-8.el6.src.rpm /builddir/build

# Shell into our environment now
mock -v -r epel-6-x86_64 --shell

# Change to the build directory
cd builddir/build

# Install the source package (which will deploy within
# the mock environment only)
rpm -Uhi simple-mtpfs-0.1-8.el6.src.rpm

# Now we can safely prepare the source for inspection.
# - the spec file will be in the SPECS/* directory
# - all patch files and source code will be in SOURCES/*
#
# Once your satisfied I'm not out to get you, you can build
# the package:
rpmbuild -ba SPECS/simple-mtpfs.spec

# we're now done with our mock environment for now; Press Ctrl-D to
# exit or simply type exit on the command line of our virtual
# environment
exit

# We'll return to the directory we were previously in.  We can copy
# out the packages we just built at this point. Ignore the warning
# about SELinux if you get one because it doesn't impact our goals.
mock -v -r epel-6-x86_64 --copyout /builddir/build/SRPMS/simple-mtpfs-0.1-8.el6.src.rpm .
mock -v -r epel-6-x86_64 --copyout /builddir/build/RPMS/simple-mtpfs-0.1-8.el6.x86_64.rpm .
mock -v -r epel-6-x86_64 --copyout /builddir/build/RPMS/simple-mtpfs-debuginfo-0.1-8.el6.x86_64.rpm .
Option 2: jmtpfs
# Fetch our source
wget --output-document=jmtpfs-0.4-1.el6.src.rpm https://www.dropbox.com/sh/9dt7klam6ex1kpp/KH6b9pmCRZ/20131015/mtp/jmtpfs-0.4-1.el6.src.rpm?dl=1

# Initialize our Environment
mock -v -r epel-6-x86_64 --init

# Now install the necessary dependencies for jmtpfs
# which we must additionally include the libmtp package we
# just built
mock -v -r epel-6-x86_64 --install libmtp-1.1.6-2.el6.x86_64.rpm
                                   libmtp-devel-1.1.6-2.el6.x86_64.rpm
                                   fuse-devel
                                   file-devel

# Now if you don't have any insecurities with source rpms you
# can finish with the next command... or you can skip it and
# extract all of it's content for inspection before building.
# all of the results will appear in the 'results' directory.
# Note: You'll want to skip this step and move to the next if
# you have any insecurities at all.
mock -v -r epel-6-x86_64 --no-clean
                         --resultdir=$(pwd)/results
                         --rebuild jmtpfs-0.4-1.el6.src.rpm

# For those really insecure can keep reading and perform
# the following steps instead of the single command above
# Copy our source into the mock building environment
mock -v -r epel-6-x86_64 --copyin jmtpfs-0.4-1.el6.src.rpm /builddir/build

# Shell into our environment now
mock -v -r epel-6-x86_64 --shell

# Change to the build directory
cd builddir/build

# Install the source package (which will deploy within
# the mock environment only)
rpm -Uhi jmtpfs-0.4-1.el6.src.rpm

# Now we can safely prepare the source for inspection.
# - the spec file will be in the SPECS/* directory
# - all patch files and source code will be in SOURCES/*
#
# Once your satisfied I'm not out to get you, you can build
# the package:
rpmbuild -ba SPECS/jmtpfs.spec

# we're now done with our mock environment for now; Press Ctrl-D to
# exit or simply type exit on the command line of our virtual
# environment
exit

# We'll return to the directory we were previously in.  We can copy
# out the packages we just built at this point. Ignore the warning
# about SELinux if you get one because it doesn't impact our goals.
mock -v -r epel-6-x86_64 --copyout /builddir/build/SRPMS/jmtpfs-0.4-1.el6.src.rpm .
mock -v -r epel-6-x86_64 --copyout /builddir/build/RPMS/jmtpfs-0.4-1.el6.x86_64.rpm .
mock -v -r epel-6-x86_64 --copyout /builddir/build/RPMS/jmtpfs-debuginfo-0.4-1.el6.x86_64.rpm .
Option 3: mtpfs
# Fetch our source from pkgs.org
wget http://dl.fedoraproject.org/pub/fedora/linux/releases/18/Everything/source/SRPMS/m/mtpfs-1.1-0.3.svn20120510.fc18.src.rpm

# Initialize our Environment
mock -v -r epel-6-x86_64 --init

# Now install the necessary dependencies for mtpfs
# which we must additionally include the libmtp package we
# just built
mock -v -r epel-6-x86_64 --install libmtp-1.1.6-2.el6.x86_64.rpm
                                   libmtp-devel-1.1.6-2.el6.x86_64.rpm
                                   autoconf automake libid3tag-devel
                                   glib2-devel fuse-devel

# If you have insecurities at this point, you'll need to
# take them up with someone else since I didn't make any
# modifications to this FUSE/MTP option at all. So we
# just need to build from source at this point.
mock -v -r epel-6-x86_64 --no-clean
                         --resultdir=$(pwd)/result
                         --rebuild mtpfs-1.1-0.3.svn20120510.fc18.src.rpm
Finally our libmtp dependency issues (if you have them).
Rhythmbox
# Fetch our source from pkgs.org
wget http://vault.centos.org/6.4/os/Source/SPackages/rhythmbox-0.12.8-1.el6.src.rpm

# Initialize our Environment
mock -v -r epel-6-x86_64 --init

# Now install the necessary dependencies for Rhythmbox
# which we must additionally include the libmtp package we
# just built
mock -v -r epel-6-x86_64 --install libmtp-1.1.6-2.el6.x86_64.rpm
                                   libmtp-devel-1.1.6-2.el6.x86_64.rpm

# Now we just rebuild from source using the new library
mock -v -r epel-6-x86_64 --no-clean
                         --resultdir=$(pwd)/results
                         --rebuild rhythmbox-0.12.8-1.el6.src.rpm

# Your rpm's will appear in the 'results' directory.
VLC
# The catch with VLC is it's development isn't frozen with
# the version of CentOS/RHEL like Rhythmbox does. This is because
# if your running this, you've already chosen to link to other
# repositories like RPMForge, ATrpms, LinuxTECH, etc.

# Mock however (out of the box) does not link to these locations
# at all. The quickest (and dirty) work around to this fix is to
# simply install 'yum' into the mock environment which we can
# use to fetch all of our dependencies (the best way is to actually)
# create a new mock configuration that just includes them. But
# everyone uses to many different alternatives; so we'll do it
# my way :)

# Fetch VLC source from the repository you use. You can do this
# using yum if you have the --download-only rpm addon. Otherwise
# just utilize pkgs.org and get the package:
# http://pkgs.org/search/?keyword=vlc&search_on=name&distro=82&exact=1
# At the time v2.0.6-1 was the version available to me.
# You may need to adjust the below commands depending on which
# package you get; I'll use a variable so you can set it to
# whatever you get at the time.

# If you are comfortable just using the version I have; you can
# download it here:
wget --output-document=vlc-2.0.6-1.el6.src.rpm https://www.dropbox.com/sh/9dt7klam6ex1kpp/pm7MCGHa9K/20131015/mtp/vlc-2.0.6-1.el6.src.rpm?dl=1

# Set this variable to something else if you fetched a different
# version
VLCVER=2.0.6-1
# Store our original source RPM Name; we do it this way
# because some people might use different packages that
# have the ending f20 (Fedora), atr (ATrpms), rf (RPMForge), etc
# This way we're working with the same file regardless of
# the version you picked
VLCSRPM=$(find -name "vlc-$VLCVER.*.src.rpm" 2>/dev/null)

# Make sure we found your rpm at this point
# The following should output a file that exists
echo $VLCSRPM

# Initialize our Environment
mock -v -r epel-6-x86_64 --init

# Now install the nessisary dependencies for vlc which we must
# additionally include the libmtp package we just built
# including 'yum' so we'll fill all the dependencies
mock -v -r epel-6-x86_64 --install libmtp-1.1.6-2.el6.x86_64.rpm
                                   libmtp-devel-1.1.6-2.el6.x86_64.rpm
                                   yum

# Now this is the dirty trick I was telling you about; we'll
# just install your current yum repositories into your mock
# environment. This will make it really easy to fill our
# dependency problems:
find /etc/yum.repos.d/ -maxdepth 1 -mindepth 1
                       -type f -name '*.repo'
                       -exec mock -v -r epel-6-x86_64
                              --copyin {} /etc/yum.repos.d/ ;

# Now we want to copy our VLC Source into the environment
mock -v -r epel-6-x86_64 --copyin $VLCSRPM /builddir/build

# Shell into our mock environment
mock -v -r epel-6-x86_64 --shell

# Change to our building directory
cd /builddir/build

# Install all our dependencies including our source
yum install $(rpm -qp --requires vlc*.src.rpm | cut -d' ' -f1)

# Install our source RPM
rpm -Uhi vlc*.src.rpm

# There is a chance this failed for you... if so
# you can use the collection of rpms I built manually
# to make it possible for me; just visit here:
# https://www.dropbox.com/sh/9dt7klam6ex1kpp/_pczPoH-Wx/20131015/mtp/dep.vlc2.0
# You can exit the shell (Ctrl-D) or type exit and by now
# you should have enough info as to how you can install these
# rpms into your mock environment using mock and --install

# Now build your RPM (this can take some time):
rpmbuild -ba SPECS/*.spec

# We're now done with our mock environment for now; Press
# Ctrl-D to exit or simply type exit on the command line
# of our virtual environment
exit

Now just copy out our packages:
mock -v -r epel-6-x86_64 --copyout /builddir/build/SRPMS/vlc-$VLCVER.el6.src.rpm .

mock -v -r epel-6-x86_64 --copyout /builddir/build/RPMS/vlc-$VLCVER.el6.x86_64.rpm .
mock -v -r epel-6-x86_64 --copyout /builddir/build/RPMS/vlc-core-$VLCVER.el6.x86_64.rpm .
mock -v -r epel-6-x86_64 --copyout /builddir/build/RPMS/vlc-extras-$VLCVER.el6.x86_64.rpm .
mock -v -r epel-6-x86_64 --copyout /builddir/build/RPMS/vlc-plugin-jack-$VLCVER.el6.x86_64.rpm
mock -v -r epel-6-x86_64 --copyout /builddir/build/RPMS/vlc-devel-$VLCVER.el6.x86_64.rpm
mock -v -r epel-6-x86_64 --copyout /builddir/build/RPMS/vlc-debuginfo-$VLCVER.el6.x86_64.rpm

# You're done now! Phewf...
Installation
The installation will vary depending on your environment. If you are using either VLC or Rhythmbox, your life might be easier if you uninstall them now (knowing your going to re-install them again shortly).
yum remove rhythmbox vlc
Now you can install libmtp and your choice of FUSE/MTP implimentation (as root):
It’s important to note that you can go ahead and install all 3 options if you really wanted to (but it’s not really worth it). Pick one… if it doesn’t work well for you, try another.
Feel free to reinstall any other packaging you were using:
Some phones/tablets may require you to toggle the USB debugging mode of your phone and/or tablet for things to work smoothly for you. If you already have it enabled, then try disabling it. This is what I had to do with my Nexus 4 anyway; it worked beautifully for me after I toggled this option. I think this may be a bug with the current MTP v1.1 libraries that don’t seem to correctly handle the mounting of the device when being first connected. But whatever handshaking goes on, through the toggling of this option corrects the problem. I’m sure we will see this resolved in future builds.
Other MTP Alternatives
There are other alternatives; but this blog was going to be long enough just trying to share the ones I chose already.
FUSE Binding for Go is another alternative I didn’t test which seems to have a lot of active development on it as well. For those who aren’t familiar with The Go Programming Language, it is basically a fairly new language that is catching on with a lot of developers.
Gnome MTP is designed to be a simple MP3 player client for MTP based devices.
Credit
Please note that this information took me several days to put together and test thoroughly. I may not blog often; but I want to re-assure the stability and testing I put into everything I intend share.
If you like what you see and wish to copy and paste this HOWTO, please reference back to this blog post at the very least. It’s really all I ask.
Sources:
I used pkgs.org to obtain rpm source packaging for vlc (v2.0.6), rhythmbox (v0.12.8), libmtp (v1.0), mtpfs (v1.1), and simple-mtpfs (v0.1) so I could rebuild with content that was already stable and tested.
Not the official website, but this website gives a good breakdown of the different MTP applications as well as the out of the box libmtp commands you can use. Wikipedia has some good info on it as well.