Category Archives: Linux Tools

KeePassX – A Password Manager and Why You Need One

Introduction

I haven’t posted in a while and I figured I was due. I usually blog specifically for Linux users, but this really applies to anyone on any operating system (Apple, Microsoft, Android, etc).

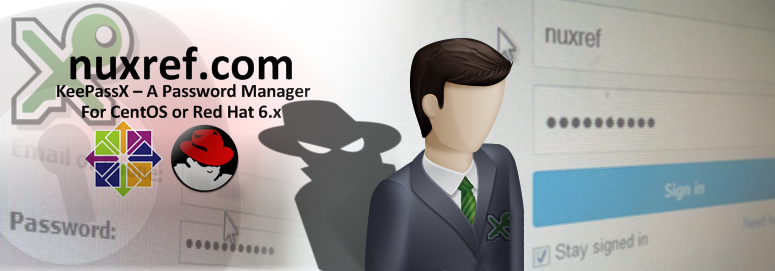
I want to encourage the use of a password manager to anyone not already using one. There are a lot of them out there, but I’m specifically interested in focusing the attention on KeePassX. There are a number of reasons why and I’ll eventually get to most of them. But for starters KeePassX is completely free (GPLv2) and as I mentioned above, it works on just about every platform!

It’s sole purpose in life is to remember passwords for you so you don’t have to. It’s used to prevent you from using the same 1-3 passwords you’re using today for everything. Instead of using your birthday, engagement and/or pets name, you’ll use passwords like: JP83bW93wwrJsZ2x6tQy3aD6W or SLJUhoQWPBRtwTwmzsCxWXqOV. Again, I emphasis that the password manager does all the memorizing for you. Not only that, but it’ll easily generate you these passwords too.

KeePassX Interface
KeePassX Interface
Now before you roll your eyes and decide you don’t need such a thing, just here me out. Give me a chance to sell you the reasons why you seriously need to consider this. I’ll attempt to do this with respect to The 5 Stages of Loss and Grief. 🙂

Stage 1: Denial

What’s the point of a password manager? I never needed one before!
A password manager is kind of like social media was to us back in February of 2004. The ideology is the same: “You didn’t know you needed it until it was shown to you”. So trust me when I tell you that you need one now. The thing is, the internet is filled with people whose sole intent is to gain access to your identity and exploit it for their own personal gain. The passwords we’ve all used up to this date are too simple; I know this because we’ve all remembered/memorized them. Even the complicated ones we confidently memorized are no good.

Just Saying...
Food for Thought

Most of us just acknowledge there is risk, but we do nothing about it. We belive that if no one has figured out our password yet, they never will. Well the scary thing is: some of them might know our password(s) already. But these people don’t want to make that evident to us. Don’t expect someone to advertise themselves once they’ve gained access to something we had protected. Instead, you’re only going to find out once the damage has been done.

Stage 2: Anger

Why would I put all my passwords in one file? Something just sounds wrong with that statement.
You would do it for the same reason you trust a bank’s security with your money. The same reason you trust your wallet or purse with your personal identity. The same reason you go to work and secure all your belongings and pets behind in your home. We put all of our eggs into one basket every day, but we’re all smart about it. We all put trust in the decision that our belongings will remain in tact until we return to it. KeePassX works exactly the same way.

Both a Password and a Key File can be used to keep your password database safe.
Both a Password and a Key File can be used keep your password database safe.
The passwords that reside in your KeePassX database are encrypted, so no one will gain access to it unless you allow it to happen. The encryption means the password database is completely useless to anyone who has it without the keys required to access it. You can even go as far as to lock it using a keyfile (KeePassX will generate for you) as well as a password.

There is no question that if a hacker gains access to your password database and has all the keys he/she needs to unlock it, then you’ve defeated it’s purpose. Your passwords are only as secure as the conscious effort you take to keep them that way. If you keep the keys to your house under the welcome mat, or your car keys in the vehicle they pair with, it’s just a matter of time before you suffer a theft in that regard too.

Stage 3: Bargaining

Can’t I just change the passwords after I read about the compromising?
The answer is No and here is why:
People are attempting to exploit us ever day through phishing, viruses, spyware, false advertising, and even through everyday tasks we didn’t even know we were a victim of. Take Sony and eBay for example. Both are very reputable companies with an entire team of security experts working with them every day, yet they still fell prey when their systems were compromised by a hacker. As a result, it’s the clients and customers that become the victims too (all of us). If you used the same password on these sites as you do everywhere else, then you’re already at risk for identity theft. The point is, sh*t happens and sometimes it’s just out of our control.

We can’t expect every organization to be like eBay and Sony either. Not all of them will alert their customers of the threat they faced or the security breach they sustained. The few that do go public may have been exploited long before they did. Hence, our personal information was at risk last week when they told us today. There are even some companies who don’t want to admit to any privacy invasions to protect their own reputation. Then there are the companies that might not even know they’ve already been compromised. So if they don’t tell us; how will we ever know?

Therefore, consider taking the extra time to change every password on every site you visit once you get KeePassX installed.

Stage 4: Depression

I don’t want to change my password everywhere.
I don’t want the burden of a another application just to manage my passwords.
I was stuck at this stage for a while. It takes a while to change passwords everywhere. But after it’s done, you have to remember that this program does absolutely everything in its power to make your life easy from this point on. You only need to add everything once; so the burden doesn’t linger.

How can such complicated password make my life easier?

Ctrl+B and Ctrl+C are all you ever need to use once KeePassX is setup.
Your life ‘will’ be simpler with KeePassX because your every day tools are now accessible by just a few keystrokes:

  1. Press ctrl-b in Password Manager: Copy the username into the clipboard
  2. Press ctrl-v in Web Browser or App: Paste the username (into the username field)
  3. Press ctrl-c in Password Manager: Copy the password into the clipboard
  4. Press ctrl-v in Web Browser or App: Paste the password (into the password field)

That’s it; don’t worry about the password (you just copied) being left in the clipboard. KeePassX looks after clearing the clipboard after a few idle seconds elapse that you configure (the default is 20 seconds). The point of me explaining this is: instead of memorizing your secret passwords you use everywhere, you only need to remember the 4 key combinations identified above. The same 4 keystrokes are used for all sites/apps you ever use/visit from this point forward. Not to mention that each password is a unique from the other and unguessable by any hacker. I can’t stress enough that the effort level decreases with a password manager. At the same time your online privacy is more secure than ever.

Stage 5: Acceptance

What about my Phone? What about my other computer? Can access my password file on other systems?
Yes! This is one of the most amazing features of KeePassX! People even place their password file on locations such as DropBox or their Google Drive so they can access it between the systems. It’s compatible with Microsoft Windows, Mac OS (including Apple iOS), Android, and Linux (of course!).

So Where Do I Get It?

Microsoft Windows and Mac OS users can just download it directly from the download area at the official KeePassX website here.

If you’re using an Android device then you can find it here on the Google Play Store.

If you’re using an Apple device then you can find it here on the iTunes Store.

Linux users can download it from pkgs.org. It’s also available from the EPEL Repositories.

For the CentOS and/or Red Hat users: if for whatever reason the links above become unavailable or you want a fast approach: KeePassX can be retrieved from the repository I’m hosting.

Install KeePassX in CentOS and/or Red Hat 6 :

# Make sure you hook up with my repository first:
# Visit : https://nuxref.com/nuxref-repository/

################################################################
# Install our required products
################################################################
yum install -y --enablerepo=nuxref keepassx
# You're Done!

KeepassX Tips

KeePassX Password Generator
KeePassX Password Generator will keep your passwords diverse and complicated.
  • For obvious reasons, password protect your password database. This is the one password you ‘will’ need to remember. So I encourage you to use a new original one, but don’t forget it!
  • Consider using a keyfile as well as the password for securing your password database. The nice thing about the keyfile is you can move it with you; keep it on a usb drive that is kept with you or in another location. This way if someone ever did get a hold of your password database, they can’t do anything without the key file even if they know your password.
  • Configure KeyPassX to lock itself after it’s been idle or minimized. By default it won’t, but it’s a simple option that will allow you to walk away from your desk and know that no one is snooping where they shouldn’t be.
  • Log onto your remote sites and consider changing your passwords every now and then. Even if it’s only once a year. Just changing your passwords annually is still better than never changing them at all! You can optionally configure KeePassX to remind you to change your passwords after they get to a certain age. Just using the built in password generator will greatly simplify your life and keep your passwords complex.

Speaking of Passwords…

Consider that your neighbors (or even someone you don’t know) could be using your wireless network while you’re at work. They could be using it even when your around. Have you been connecting to your wireless router lately to see if you can account for everyone connected to it? Now would be a good time to change this password too!

Pay attention to the sites you use and make sure they use some form of login encryption. For example, logging into a website that isn’t secure means anyone can easily extract your username password combination without your knowledge.

Privacy Compromised

Just do a Google search for +breach +password +hacked to get an idea of how many companies are getting hacked constantly and how easy it is for someone to figure out your password and re-use it elsewhere.

Final Notes
Sure, Password Managers aren’t for everyone; don’t worry, I get that. But if you truly want to prepare yourself and prevent having to deal with unnecessary online fraud, or identity theft… If you truly wasn’t to avoid venturing through The 5 Stages of Loss and Grief which follows these awful crimes, then you should consider protecting yourself now. Take the plunge and get a password manager and diversify your passwords.

It’s better to be safe than sorry.

Credit

If you like what you see and wish to copy and paste this HOWTO, please reference back to this blog post at the very least. It’s really all I ask.

Sources

Here are some other links you may find useful:

Datetools: Date Manipulation and Cron Alternative For Linux

Introduction to Datetools

I wrote Datetools (in C++) to allow the manipulation of date time from the command line. It greatly simplified my life and maybe it will help yours out too!. It comprises of two core applications:

  • Dateblock: allows you to block until a scheduled period of time arrives unlike sleep which blocks for a set period of time. I found this so helpful, I ended up additionally building in an python extension for it.
  • Datemath: This application is just a simple way of preforming simple math on the system date.

The source code can be found here on GitHub if you’re interested in compiling it yourself. Or you can just scroll to the bottom of this blog where I provided the packaged goods.

Dateblock

The tool works very similarly to cron and sleep (a combination of the two); you can pass it a crontab string if that’s what you’re used too, or you can simply pass it in variables as arguments as well (as all other commands work):

Here’s is an example of what I mean:

# block until a minute divisible by 10 is reached:
# ex: HH:00, HH:10, HH:20, HH:30, HH:40, and HH:50
dateblock --minute=/10
# We will only reach this line when the above scheduled time has
# been met.
echo "Scheduled time reached; current time is: $(date)"

An equivalent crontab entry would look like this:

# block until a minute divisible by 10 is reached:
/10 * * * * echo "Scheduled time reached; current time is: $(date)"

Dateblock can also do another cool feature called ‘drifting’ which allows you to schedule processes on delayed cycles… Note that drifting is always specified in seconds. For example:

# Unblock on 5 minute cycles, but 2 minutes (120 seconds) into them:
# ex: HH:02, HH:07, HH:12, HH:17, HH:22, etc..
dateblock --minute=/5 --drift=120
# We will only reach this line when the above scheduled time has
# been met.
echo "Scheduled time reached; current time is: $(date)"

An equivalent crontab entry would look like this:

# block until a minute divisible by 10 is reached:
/5 * * * * sleep 120; echo "Scheduled time reached; current time is: $(date)"

The complexity of the tool can be as powerful as you want it to be:

# Unblock only on hours divisible by 5 on the 1st through to the 14th
# of every month (as well as the 20th). Unblock only when 30 seconds
# of that minute has elapsed.
 dateblock -o /5 -d 1-14,20 -s 30
# We will only reach this line when the above scheduled time has
# been met.
echo "Scheduled time reached; current time is: $(date)"

There is no way to reproduce this in a crontab unless the 30 second reference at the end is unnecessary… in that case:

# block until a minute divisible by 10 is reached:
0 /5 1-14,20 * * sleep 120; echo "Scheduled time reached; current time is: $(date)"

Just like crontabs, dateblock supports minute, hour, day of month, month and day of week. In addition, dateblock support seconds too. dateblock accepts traditional crontab entries as well as arguments:

#     day of week (0 - 6) (Sunday=0) --+
#     month (1 - 12) ---------------+  |
#     day of month (1 - 31) -----+  |  |
#     hour (0 - 23) ----------+  |  |  |
#     min (0 - 59) --------+  |  |  |  |
#  ***sec (0 - 59) -----+  |  |  |  |  |
#                       |  |  |  |  |  |
#                       -  -  -  -  -  -
# Dateblock Cron Entry: *  *  *  *  *  *
# Cron Crontab Entry:      *  *  *  *  *

# Unblock on the specific hours of 0 and 12:
# ex: HH:00, HH:12
$> dateblock --cron="0 0 00,12"

You’ll notice in the above, I didn’t bother specifying the remaining cron fields… In this case they will assume the default of *. But you can feel free to specify a * for readability. The other thing to observe is the addition of the second column which isn’t present in a regular crontab entry. It’s rules are no different then what you’ve already learned from other fields.

Testing

Simply adding a –test (-t) switch to your dateblock entry will allow you to test the tool in a debugging mode to which it will present to you the current time followed by when it would have unblocked for had you not provided the –test (-t) switch. It’s a great way to calculate when the next processing time will be.

Python Extension

To handle scheduled processes for my websites, I created a python extension for dateblock. This allowed to extend it’s flexibility with other offline processing… consider the following example:

from dateblock import dateblock
while True:
    # /5 as first argument means unblock on the 5th second of each minute
    dateblock('/5')
    print 'begin processing ...'
    # your code here...
    # if you want, you can even report the next unblock time
    print 'Done processing; blocking until %s' % 
        dateblock('/5', block=False).strftime('%Y-%m-%d %H:%M:%S')

You can also also access the drift as such:

from dateblock import dateblock
print 'Unblock at %s' % 
    dateblock('/5', drift=120, block=False).strftime('%Y-%m-%d %H:%M:%S')

Finally the python extension allows you to pass in a datetime object as an argument for calculating a time based on another (and not the current time which is the default).

from dateblock import dateblock
from datetime import datetime
from datetime import timedelta

# 31 days ago
reftime = datetime.now() - timedelta(days=31)

print('Would blocking until %s' % 
    dateblock('/5', drift=120, block=False, )
      .strftime('%Y-%m-%d %H:%M:%S') + 
    " if time was %s" % reftime
      .strftime('%Y-%m-%d %H:%M:%S'))

Things to Consider

Just like sleep, dateblock uses SIGALARM to manage its wake up time. Therefore if your code relies heavily on SIGALARM for another purposes, dateblock may not be a solution for you since you could interrupt it’s reliability (though not likely). This really shouldn’t be a big concern because this exact same warning comes with the sleep libraries we’ve been using for years. But it does mean that sleep could interfere with dateblock just as dateblock could interfere with sleep if they were both used in separate threads.

Dateblock vs Sleep
Dateblock vs Sleep

Why would I use dateblock over sleep?

Scheduling is the key… If your program relies completely on sleep, then the only thing you’re accomplishing is cpu throttling (controlling unnecessary thrashing). This is approach is fine if you’re going to just retry connecting to an unresponsive server in ?? seconds. But what if timing becomes an important factor of your application? The dateblock tool ensures you only unblock at absolute times vs sleep which unblocks at relative times with respect to when it was called.

Dateblock also allows your program to chronologically work in turn with other applications that may be on their own processing cycle. Such as something delivering data at the top of every hour. You may wish to have your program wake up 5 min after the top of each hour to perform the processing regardless of when your program was started.

Datemath

There isn’t as much to be said about Datemath; I personally never found a Linux/Unix tool that would allow me to script date/time calculations from the command line. For that reason, this tool exists.
Here is an example of the tools function:

# what time is it now?
date +'%Y-%m-%d %H-%M-%S'
# The above output was '2013-10-26 09-42-21' at the time of this blog
# what time will it be 5 months and 3 days from now
datemath --months=5 --days=3 --format='%Y-%m-%d %H-%M-%S'
# the above output was '2014-03-29 09-42-21' at the time of this blog
# and this makes sense... this is the calculation we want.

The tool supports negative values for calculating into the past as well and will handle leap years in the calculations too.

# what time is it now?
date +'%Y-%m-%d %H-%M-%S'
# The above output was '2013-10-26 09-45-45' at the time of this blog
# What was the current date 753 days ago?
datemath --days=-753 --format='%Y-%m-%d %H-%M-%S'
# the above output was '2011-10-04 09-45-45' at the time of this blog
# and this makes sense... this is the calculation we want.

No Python Module For Datemath

There is no python module for datemath because Python’s datetime and timedelta libraries already provide a fantastic solution for the same problem datemath solves…

# Simple code example to show why it really isn't
# necessary to port datemath to Python:
from datetime import datetime
from datetime import timedelta
in_the_past = datetime.now() - timedelta(minutes=15)
print '15 minutes ago: %s' % in_the_past
                              .strftime('%Y-%m-%d %H:%M:%S')

Just give me the goods

No problem, below are the RPMS as well as their accompanied source packages:

Package Download Description
dateblock
el6.rpm
/
el7.rpm
The powerful (cron like) command line interface (CLI) tool.
python-dateblock
el6.rpm
/
el7.rpm
The python extension for dateblock.
datemath
el6.rpm
/
el7.rpm
The datemath command line interface tool.
datetools
el6.rpm
/
el7.rpm
An optional package which includes licensing and information.

Note: The source rpm can be obtained here which builds everything you see in the table above. It’s not required for the application to run, but might be useful for developers or those who want to inspect how I put the package together.

No way, I’m building this myself; I don’t trust you

That’s okay, I understand; here is how you can build it yourself:

# Install 'mock' into your environment if you don't have it already
# This step will require you to be the superuser (root) in your native
# environment.
yum install -y mock

# Grant your normal every day user account access to the mock group
# This step will also require you to be the root user.
usermod -a -G mock YourNonRootUsername

At this point it’s safe to change from the ‘root‘ user back to the user account you granted the mock group privileges to in the step above. We won’t need the root user again until the end of this tutorial when we install our built RPM.

# Create an environment we can work in
mkdir datetool-build

# Change into our temporary working directory
cd datetool-build

curl -L --output datetools-0.8.1.tar.gz \
   https://github.com/caronc/datetools/archive/v0.8.1.tar.gz

# Extract Spec File
tar xfz datetools-0.8.1.tar.gz \
   datetools-0.8.1/datetools.spec \
      --strip-components=1

# Initialize Mock Environment
mock -v -r epel-6-x86_64 --init

# Now install our dependencies
mock -v -r epel-6-x86_64 --install boost-devel libstdc++-devel 
          glib-devel python-devel autoconf automake libtool

# Copy in our downloaded content:
mock -v -r epel-6-x86_64 --copyin datetools-0.8.1.tar.gz
   /builddir/build/SOURCES
mock -v -r epel-6-x86_64 --copyin datetools.spec 
   /builddir/build/SPECS

# Shell into our environment
mock -v -r epel-6-x86_64 --shell

# Change to our build directory
cd builddir/build

# Build our RPMS
rpmbuild -ba SPECS/datetools.spec

# we're now done with our mock environment for now; Press Ctrl-D to exit
# or simply type exit on the command line of our virtual environment
exit

Future Considerations

This is totally up in the air, at the moment the tool does everything I needed at the time. However I could see the following becoming a useful feature in the future:

  • Pass in a different time into both programs (instead of always working with the current time) (You can already do this with the dateblock python extension).
  • Have dateblock additionally take in a program and arguments as input to have it automatically execute the call to it when the scheduled time is reached. In addition to this, it means the dateblock tool would daemonize itself and run in the background on reoccurring schedules.
  • Add a devel package and create a shared library for C++ linking; perhaps the binary tools and extensions could link here too. Right now the library is just so small it’s really nothing to just include it statically as it is now.
  • Got an idea of your own? Pass it along! You can also submit a pull request to me on GitHub here.

Credit

Please note that this information took me several days to put together and test thoroughly. I may not blog often; but I want to re-assure the stability and testing I put into everything I intend share.

If you like what you see and wish to copy and paste this information, please reference back to this blog post at the very least. It’s really all I ask.

Offline Blogging Solutions with CentOS 6

Introduction

BloGTK v2.0
BloGTK v2.0

Offline Blogging in Linux doesn’t offer us a wide selection of free (open source) choices. Of the choices we do have at our disposal each have their own pros and cons which are really just bias opinions we’ll all carry with each other. This blog isn’t going to tell you which product is better and which one isn’t. It will provide you some alternatives to what’s already available and allow you to choose on your own. I also make additionally options available to you here as well should you choose to try them.

Keep in mind I run CentOS 6 as my primary OS (currently), so I focus primarily on making these products work on this distribution. But this doesn’t mean that all of the source RPMs I provided won’t compile for you in another distribution.

Drivel v3.0.0 Login Screen

Open Source Offline Blogging Choices

The below outline some of the choices I found to be worth of digging further in:

I’m not sure what the status is on all of these project themselves. At this current time, I have to assume that both Drivel and BloGTK are some what dead since the last update to either of them

Gnome Blog v0.9.2
Gnome Blog v0.9.2

was back in late 2009. Meanwhile the last update made to Gnome Blog was in early 2010.

It is said that beggars can’t be choosers. So rolling with that in mind and the Open Source solutions available to us, we’ll accept what is offered and move on.

Hand over your work

With pleasure; it really didn’t take any time at all to package these properly.

Drivel (v3.0.0) took the most time to package; but even that didn’t take much effort. Drop Line provided a spec file of their own which didn’t work out of the box. It also didn’t include all the necessary dependencies. For this reason I just spun my own version of it. Have a look here if you want to see the spec file I generated.

BlogGTK v2.0 didn’t take me hardly any time at all. They didn’t change the installation that much from v1.1. The fact that it’s python based; there really isn’t a whole lot too it. You can view the spec for yourself if you’re interested.

Alternatively you can just fetch bloGTK from Pkgs.org which does such a great job organizing packages other people have put together. It’ll probably be an older version (as it was for me). At the time I wrote this blog it was BloGTK v1.1 on Pkgs.org hosted by RPMForge. It might be different when you try.

Gnome Blog was another one that actually packaged it’s own spec file within the official packaging. But the file was drastically missing dependencies and would not work out of the box at all. I had to massage it quite a bit; you can view the spec file here if you feel the need.

I will never trust you; I’ll build it for myself

Still feeling that way? No problem; here is how you can do it:

First off, I’m not a big fan of compiling code as the root user on the system I work with daily.   I am however a big fan of a tool called ‘mock‘ which allows us to develop software as root except within a safe virtual environment instead of our native one. I am also a big fan of package management; whether its a .DEB (Debian Package) or .RPM (Red Hat Package) for obvious reasons. For this tutorial; I’ll stick with RPMs since it’s what CentOS uses. We’ll prepare the RPMs and preform all our compilations within the mock environment.

# Install 'mock' into your environment if you don't have it already
# This step will require you to be the superuser (root) in your native
# environment.
yum install -y mock

# Grant your normal every day user account access to the mock group
# This step will also require you to be the root user.
usermod -a -G mock YourNonRootUsername

At this point it’s safe to change from the ‘root‘ user back to the user account you granted the mock group privileges to in the step above.  We won’t need the root user again until the end of this tutorial when we install our built RPM.

# Optionally fetch bloGTK v2.0
wget https://launchpad.net/blogtk/2.0/2.0/+download/blogtk-2.0.tar.gz
wget --output-document=blogtk.spec https://www.dropbox.com/sh/9dt7klam6ex1kpp/GR0uXU6PaC/20131008/blogtk.spec?dl=1

# Optionally fetch Drivel 3.0.0
wget --output-document=drivel-3.0.0.tar.bz2 http://prdownloads.sourceforge.net/drivel/drivel-3.0.0.tar.bz2?download
wget --output-document=drivel.spec https://www.dropbox.com/sh/9dt7klam6ex1kpp/MKD34uuBMs/20131008/drivel.spec?dl=1

# Optionally fetch gnome-blog v0.9.2
wget http://ftp.gnome.org/pub/GNOME/sources/gnome-blog/0.9/gnome-blog-0.9.2.tar.gz
wget --output-document=gnome-blog.spec https://www.dropbox.com/sh/9dt7klam6ex1kpp/O9nJdxoJMZ/20131008/gnome-blog.spec?dl=1

# Initialize Mock Environment
mock -v -r epel-6-x86_64 --init

# bloGTK dependencies
mock -v -r epel-6-x86_64 --install 
  python pygtk2 pygtk2-libglade desktop-file-utils

# Drivel dependencies
mock -v -r epel-6-x86_64 --install 
  gnome-doc-utils intltool gtk2 gtkspell-devel 
  glib-devel gtk2-devel GConf2-devel 
  gnome-vfs2-devel gtksourceview2-devel 
  libsoup-devel libxml2-devel

# gnome-blog dependencies
mock -v -r epel-6-x86_64 --install 
  pygtk2-devel gettext intltool 
  desktop-file-utils GConf2-devel 
  python-devel

mock -v -r epel-6-x86_64 --copyin blogtk.spec /builddir/build/SPECS
mock -v -r epel-6-x86_64 --copyin gnome-blog.spec /builddir/build/SPECS
mock -v -r epel-6-x86_64 --copyin drivel.spec /builddir/build/SPECS

mock -v -r epel-6-x86_64 --copyin drivel-3.0.0.tar.bz2 /builddir/build/SOURCES
mock -v -r epel-6-x86_64 --copyin gnome-blog-0.9.2.tar.gz /builddir/build/SOURCES
mock -v -r epel-6-x86_64 --copyin blogtk-2.0.tar.gz /builddir/build/SOURCES
mock -v -r epel-6-x86_64 --shell

# Within Shell Environment, Build the Desired RPM
rpmbuild -ba builddir/build/SPECS/drivel.spec
rpmbuild -ba builddir/build/SPECS/blogtk.spec
rpmbuild -ba builddir/build/SPECS/gnome-blog.spec

# exit shell (or press Cntrl-D)
exit

# Copy out your blogger of interest
mock -v -r epel-6-x86_64 --copyout /builddir/build/SRPMS/drivel-3.0.0-1.el6.src.rpm .
mock -v -r epel-6-x86_64 --copyout /builddir/build/RPMS/drivel-debuginfo-3.0.0-1.el6.x86_64.rpm .
mock -v -r epel-6-x86_64 --copyout /builddir/build/RPMS/drivel-3.0.0-1.el6.x86_64.rpm .

mock -v -r epel-6-x86_64 --copyout /builddir/build/SRPMS/blogtk-2.0-1.el6.src.rpm .
mock -v -r epel-6-x86_64 --copyout /builddir/build/RPMS/blogtk-2.0-1.el6.noarch.rpm .

mock -v -r epel-6-x86_64 --copyout /builddir/build/SRPMS/gnome-blog-0.9.2-1.src.rpm .
mock -v -r epel-6-x86_64 --copyout /builddir/build/RPMS/gnome-blog-0.9.2-1.x86_64.rpm .
mock -v -r epel-6-x86_64 --copyout /builddir/build/RPMS/gnome-blog-debuginfo-0.9.2-1.x86_64.rpm .

# Install your blogger of choice; you'll need to be root or
# have sudoers permission to do this:
yum localinstall drivel-3.0.0-1.el6.x86_64.rpm
yum localinstall blogtk-2.0-1.el6.noarch.rpm
yum localinstall gnome-blog-0.9.2-1.x86_64.rpm

Drivel & WordPress

Drivel supports WordPress with a small with the following configuration:

  1. Configure your User/Pass as you normally would have
  2. Set the Movable Type to Journal type
  3. Set the Server Address field to be http://yourusername.wordpress.com/xmlrpc.php. For example I would have put http://nuxref.wordpress.com/xmlrpc.php for my own blog.

Another thing to note about Drivel is I was unable to retrieve a list of recent posts made to the WordPress server. However every other aspect of the tool appears to fine. People using different blog engines may not notice any problem at all.

Gnome-Blog & WordPress

  1. Set the Blog Type to Self-Run Other
  2. Set the Blog Protocol to MetaWeblog
  3. Set the XML-RPC URL field to be http://yourusername.wordpress.com/xmlrpc.php. For example I would have put http://nuxref.wordpress.com/xmlrpc.php for my own blog.
  4. Configure your User/Pass as you normally would have

Not Open Source, but other Free Alternatives:

  • ScribeFire:A plugin exists for Firefox & Chrome users called ScribeFire which also enables blogging functionality from within your browser. It’s worth noting as another alternative if you want it. It doesn’t involve extra packaging since it can be installed from within your browser.
  • Thingamablog: Another free solution; Thingamablog provides the binaries directly from their website here

Credit

If you like what you see and wish to copy and paste this HOWTO, please reference back to this blog post at the very least. It’s really all I ask.

If I forgot any (Open Source) Offline Bloggers that you know about; please let me know. I have no problem updating this blog to accommodate it.

Sources

I referenced the following resources to make this blog possible: